4-Wire Submersible Pump Wire Splicing Instructions
Proper wire splicing is critical for submersible pump performance. A clean, tight, and waterproof splice helps prevent motor failure, water intrusion, corrosion, and electrical issues.
Shop Submersible Pumps
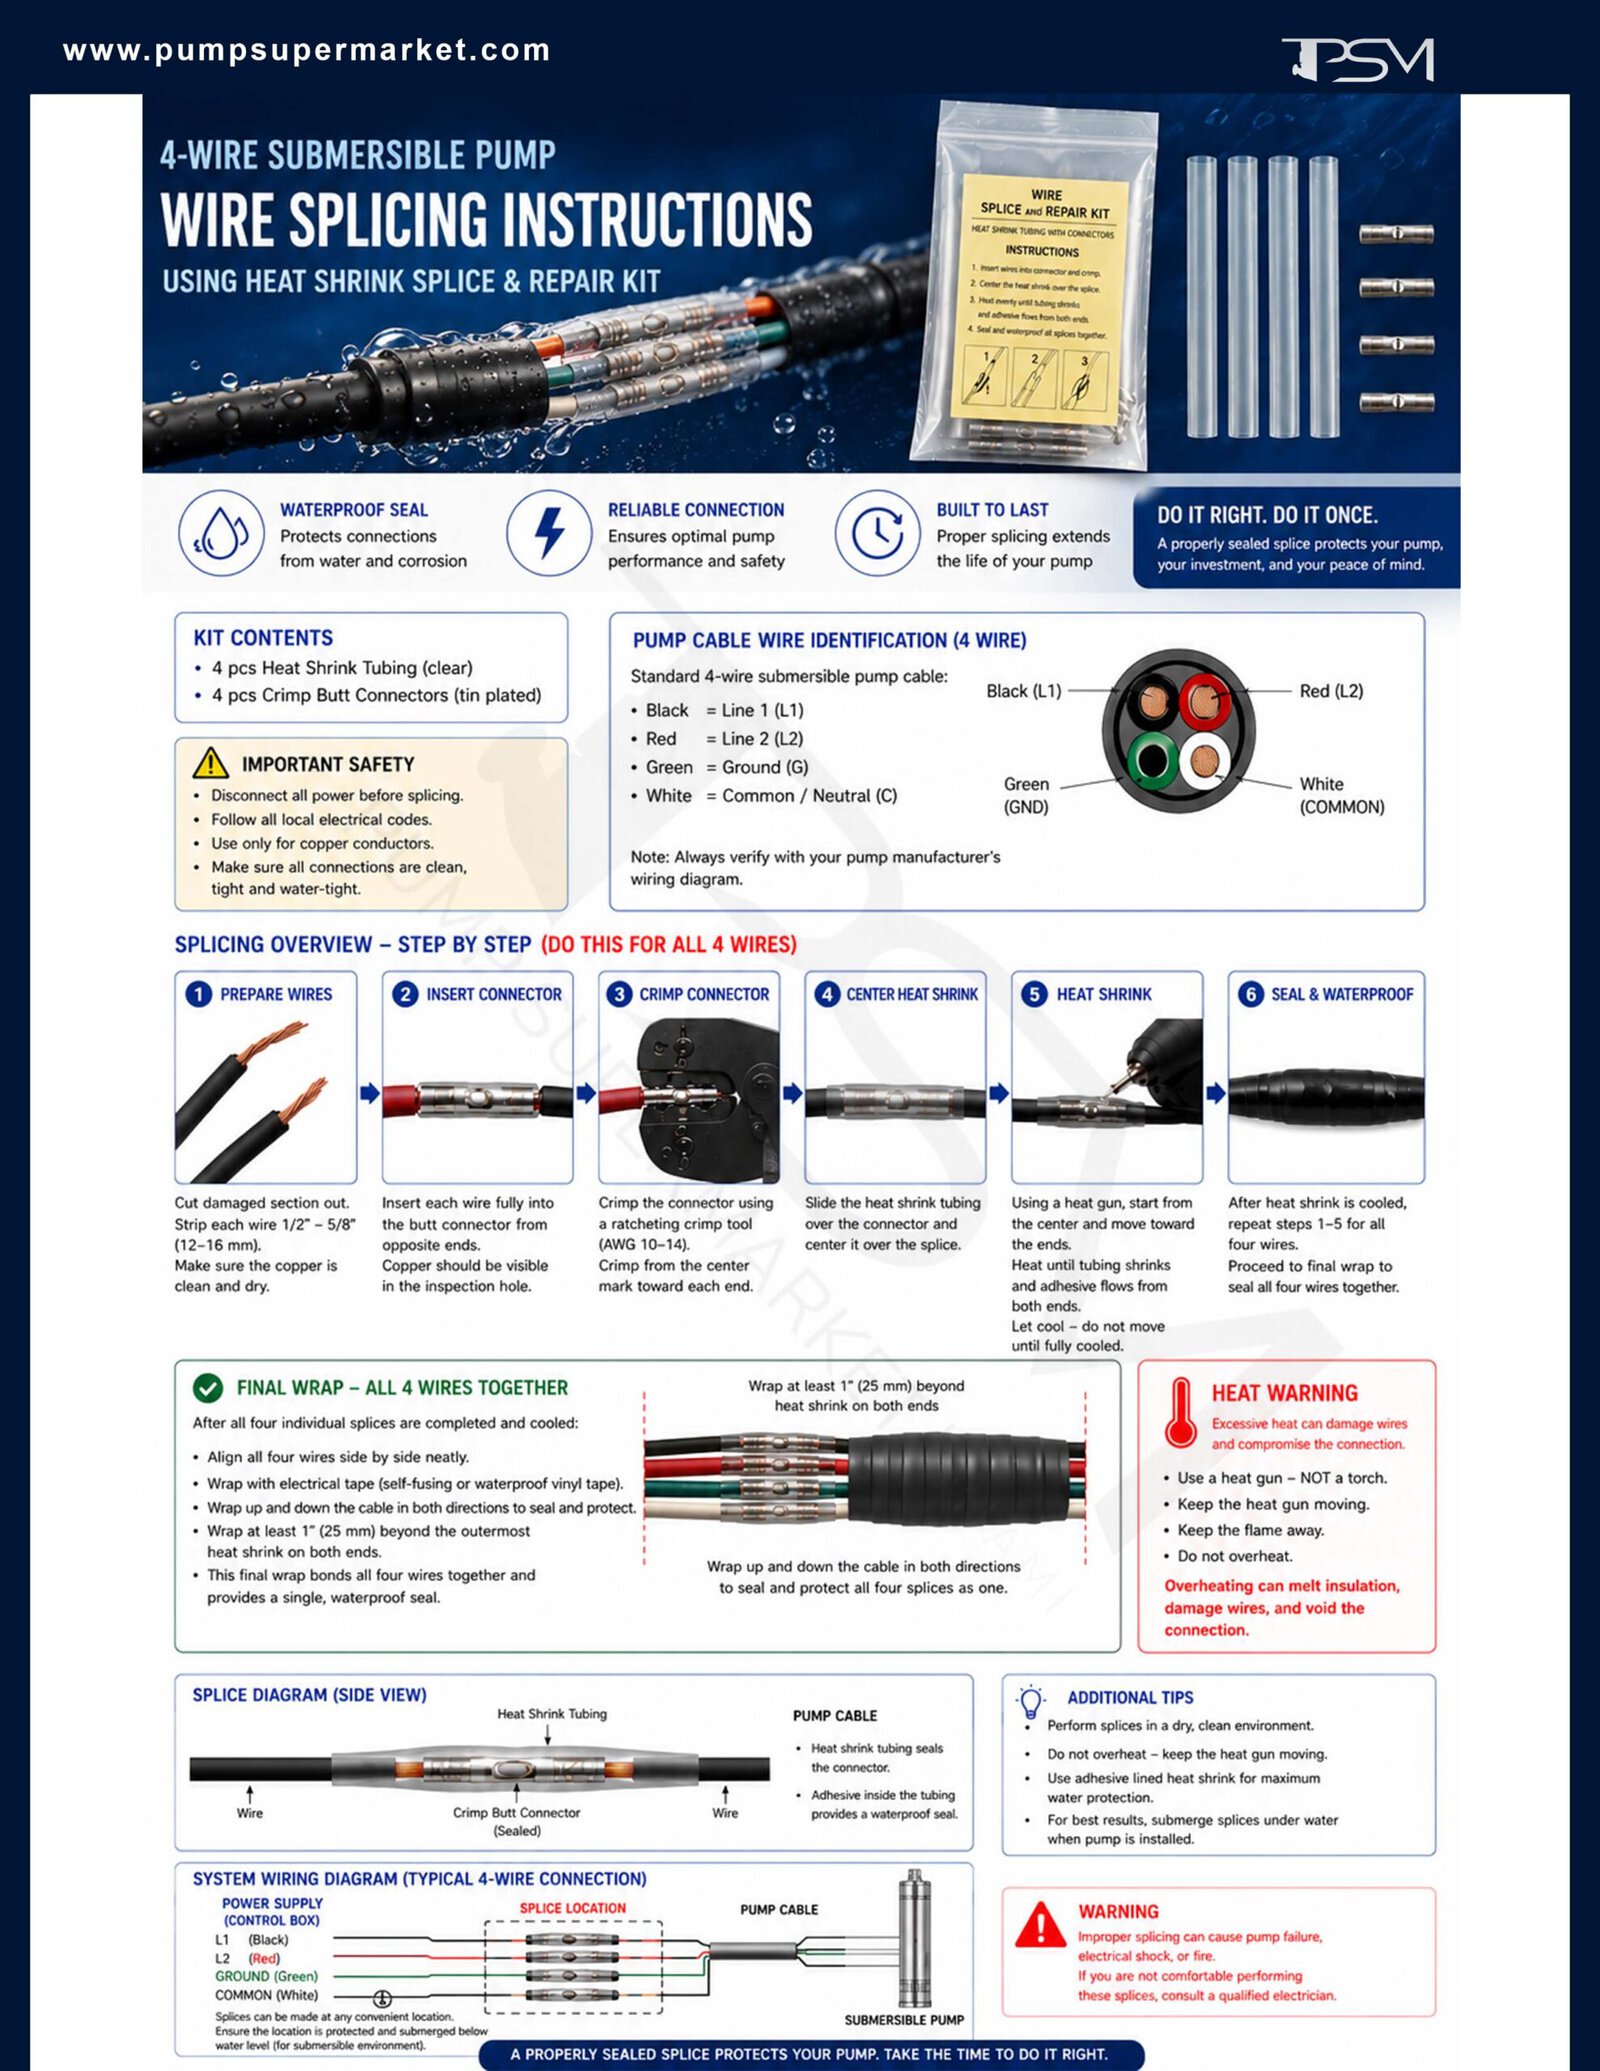
Kit Contents
- 4 heat shrink tubes
- 4 crimp butt connectors
Typical 4-Wire Identification
| Wire Color | Connection |
|---|
| Black | Line 1 / L1 |
| Red | Line 2 / L2 |
| Green | Ground |
| White | Common / Neutral |
Note: Always verify the wiring diagram supplied with your pump before making connections.
Step-by-Step Splicing Instructions
Step 1
Prepare the Wires
Disconnect all power. Cut away damaged wire. Strip approximately 1/2" to 5/8" of insulation from each wire. Make sure the copper is clean and dry.
Step 2
Install Heat Shrink First
Slide one heat shrink tube onto each wire before crimping the connector.
Step 3
Crimp the Connector
Insert both wire ends fully into the butt connector and crimp securely using the correct crimping tool. Tug lightly to confirm a strong connection.
Step 4
Center the Heat Shrink
Slide the heat shrink tubing over the connector so it is centered over the splice.
Step 5
Apply Heat Carefully
Use a heat gun and start from the center of the tube, moving slowly toward both ends until the tubing shrinks and adhesive flows from the ends.
Step 6
Repeat for All 4 Wires
Repeat the same process for black, red, green, and white wires. Allow all splices to cool completely before handling.
Final Waterproof Wrap — All 4 Wires Together
After all four individual splices are completed and fully cooled, align the four spliced wires side by side. Wrap all four wires together using electrical tape, self-fusing tape, or waterproof vinyl tape.
Wrap up and down the cable in both directions, extending at least 1 inch beyond the outermost heat shrink on both ends. This final wrap bonds all four wires together and creates one additional waterproof protective layer.
Important Heat Warning
Do not overheat the splice. Excessive heat can melt wire insulation, damage the copper conductor, weaken the splice, or cause future electrical failure.
- Use a heat gun, not an open flame torch.
- Keep the heat gun moving at all times.
- Do not hold heat in one spot for too long.
- Stop heating once the tubing is tight and adhesive appears at both ends.
- Let the splice cool completely before moving or wrapping it.
Final Inspection
- Each crimp connection is tight.
- No copper is exposed.
- Heat shrink adhesive is visible at both ends.
- All four wires are wrapped together as one sealed section.
- The splice is smooth, tight, and waterproof before installation.
Safety Notice
Improper splicing can cause pump failure, electrical shock, fire, or water intrusion into the motor. If you are not comfortable performing this work, consult a qualified electrician or pump installer.
Need a Replacement Submersible Pump?
Browse Pump Supermarket’s selection of submersible pumps for residential, agricultural, commercial, and industrial water applications.
View Submersible Pumps

 Easy Selector

 +1 (786) 613-5872
